

Introduction
A poorly mounted air compressor can turn into a nightmare of rattling noises, premature belt wear, and even engine damage. Whether you’re retrofitting a new compressor or upgrading an existing setup, the bracket’s design, vibration isolation, and belt tension are critical to reliability. This guide dives into professional techniques for mounting air compressor brackets across diesel and gasoline engines, ensuring smooth operation and extended component life.
Section 1: Tools and Materials Checklist
Essential Tools:
- Torque wrench (20–50 ft-lb range).
- Dial caliper or shims (for gap measurement).
- Belt tension gauge or frequency analyzer.
- Anti-seize compound and threadlocker.
- Vibration-damping mounts (rubber, polyurethane, or hydraulic).
Bracket Materials:
- Cast steel: For heavy-duty diesel engines (e.g., Cummins ISX15).
- Aluminum alloy: Lightweight option for passenger vehicles.
- Adjustable brackets: Allow fine-tuning for aftermarket compressors.
Safety First:
- Disconnect the battery to avoid accidental engine starts.
- Use engine support bars when removing OEM brackets.
Section 2: Selecting the Right Bracket
Step 1: Match the Bracket to Engine Architecture
- Inline engines: Look for brackets with vertical mounting points (e.g., Detroit DD13).
- V-type engines: Opt for angled brackets that clear intake manifolds (e.g., Ford Power Stroke).
Key Tip: Cross-reference compressor and engine bolt patterns using OEM diagrams or ACME’s compatibility database [link].
Step 2: Verify Clearance and Load Capacity
- Measure clearance between the compressor pulley and fan/radiator (minimum 1 inch).
- Ensure the bracket’s load rating exceeds the compressor’s weight + belt tension forces.
Red Flag: Bending or flexing under load? Upgrade to a reinforced bracket.
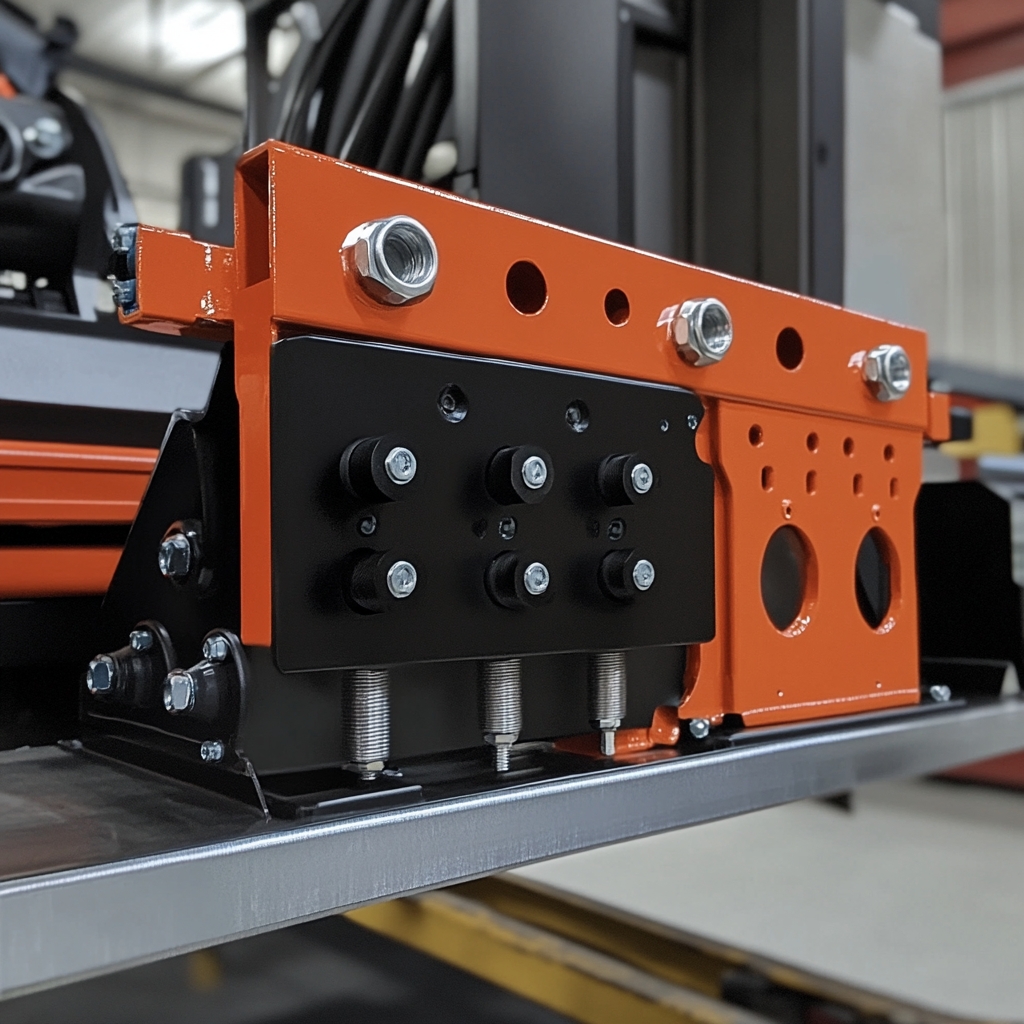
Section 3: Installing Vibration-Damping Mounts
Step 3: Choose the Right Damping Material
- Rubber mounts: Budget-friendly for low-vibration gasoline engines.
- Polyurethane mounts: Higher durability for diesel applications.
- Hydraulic mounts: Ideal for high-RPM or turbocharged engines.
Pro Tip: Stiffness (measured in Shore hardness) should match engine vibration frequency.
Step 4: Mounting Process
- Isolate the Bracket: Place damping mounts between the bracket and engine block.
- Torque Gradually: Tighten bolts in a star pattern to 80% of final torque (e.g., 25 ft-lb), then recheck alignment.
- Final Torque: Apply OEM-spec torque (e.g., 35 ft-lb for Duramax LB7) with threadlocker.
Pitfall Alert: Over-compressed mounts lose damping efficiency. Use shims to maintain 10–15% compression.
Section 4: Calculating and Setting Belt Tension
Step 5: Measure Baseline Tension
- Use a Krikit II tension gauge:
- Place the gauge midway between pulleys.
- Press until the arrow aligns with the belt’s recommended deflection (e.g., 0.5” per 12” span).
- Frequency Method (for serpentine belts):
- Pluck the belt like a guitar string.
- Use a frequency app (e.g., Gates Sonic Tension) to match Hz to the target tension.
Step 6: Adjust for Operating Conditions
- Cold climates: Increase tension by 10% to offset belt contraction.
- High-load applications: Add 15% tension for heavy-duty compressors (e.g., train HVAC systems).
Formula:
T=g4×L×f2×W
Where T = tension (N), L = span length (m), f = frequency (Hz), W = belt mass (kg/m), g = gravity (9.81 m/s²).
Section 5: Post-Installation Validation
Step 7: Run Vibration Tests
- Start the engine and rev to 2,000 RPM.
- Use a vibration analyzer to measure bracket acceleration (aim for < 5 m/s²).
Problem Signs:
- Peaks at 50–100 Hz: Loose bracket bolts.
- Peaks > 200 Hz: Belt misalignment.
Step 8: Inspect Belt Wear Patterns
- Glazing: Over-tensioned belt (reduce tension by 10–15%).
- Cracking: Under-tensioned or aged belt (replace immediately).
Section 6: Troubleshooting Common Issues
Problem 1: Persistent Vibration Noise
- Causes:
- Incorrect mount stiffness (e.g., rubber mounts on a diesel).
- Resonance between engine and bracket.
- Fix: Swap to hydraulic mounts or add a tuned mass damper.
Problem 2: Rapid Belt Wear
- Causes:
- Pulley misalignment (use a laser alignment tool).
- Contaminated belt (oil/grease exposure).
- Fix: Clean pulleys with brake cleaner and realign.
Conclusion
Mounting an air compressor bracket isn’t a “bolt-on and forget” job—it’s a precision balancing act between mechanical stability and vibration control. By selecting the right bracket, isolating vibrations, and setting belt tension scientifically, you’ll eliminate noise complaints and slash maintenance costs. For fleet managers and rebuilders, investing 30 extra minutes in this process can add years to your compressor’s lifespan.
Upgrade Your Setup: Explore ACME’s vibration-optimized compressor brackets here, featuring laser-aligned mounting points and OEM-grade damping.

